Moroccan Meloui is a layered laminated fried pan bread similar to a paratha. I recently found out that it actually takes its name from the Arabic word Mlloui which means “rolled up” and this, of course, makes perfect sense since this bread is rolled up into coil shapes before they’re traditionally flattened then cooked on a pan over a stove. If prepared properly, the cooked Meloui is pulled apart from its coiled shape and separated inside out into a soft flaky dough crispy around the edges. Commonly enjoyed as a breakfast or for evening tea time accompanied with butter and honey, or cheese, salami and olives served in cute little tagines, and of course some Moroccan Tea. There are some delicious filled variations too.
Make Your Own Meloui Variation
Although Meloui is very common street food in Morocco, homemade Moroccan meloui is definitely the best. My kids don’t like the market or bakery type because they got used to the homemade texture and taste and minimal use of semolina for a slightly chewier inside and crispy outside. I’m sure everyone has their own preferred mix of flours and fat which is probably why there are so many different variations to Meloui depending on the region it’s from. So, when you get confident enough, it’s advised to play around with the recipe to find your own preferred ratio of flour, but in general, try to have some semolina. Usually, either fine semolina or durum flour comprises at least 1/3 of the total flour volume. However, if you would like to experiment with just flour maybe wholemeal with white or something, at least use some semolina to sprinkle in between the folding and rolling process, this will help separate the layers and pull apart when cooked.
A note to add at this point is, although Meloui is traditionally made with butter, it is still acceptable to use only oil for a dairy-free Meloui version. So if you are vegan for example or allergic to dairy, it does still work in texture it just might differ slightly in taste.
Meloui Is Not A Healthy Food So Don’t Try Making It Healthy
Truth be said, Meloui is not healthy food and there’s not much you can do to make it a healthy food. The combination of flour, yeast and fat is actually the opposite. Moroccan Meloui is a comfort food that can be occasionally enjoyed on special days or indulge in over a summer holiday, but definitely not twice a day as they do in Morocco ;). The amount of butter & oil used in making the Meloui can greatly affect the outcome of it as it contributes to how the dough is handled and shaped. So, you can’t be afraid to use the fat. It’s all about the butter and oil, so use it and use it generously!
If It’s Your First Time Making Meloui
If this will be your first attempt in making Moroccan Meloui, I would strongly suggest you set aside some time to do this with no distractions. The first time can really test your patience but that’s ok, Meloui is not something anyone masters straight away. In fact, it always takes a few attempts to really understand the process, even for Moroccans. Try halving this mixture for an easier and less frustrating experience. Gather all of your ingredients and prepare a large, clean workspace to complete your work. I find that working directly on a clean kitchen counter worktop works best or even a kitchen table with a smooth wipeable surface. The big space makes the spreading out & folding of the dough much easier, faster and less restrictive. It may need a good clean afterwards but it’s worth it.
What To Cook Meloui On
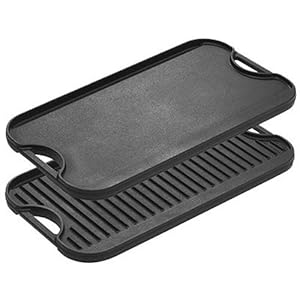
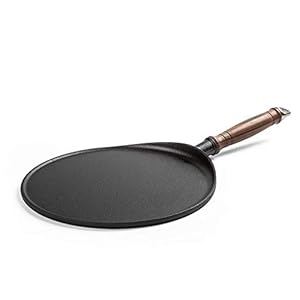
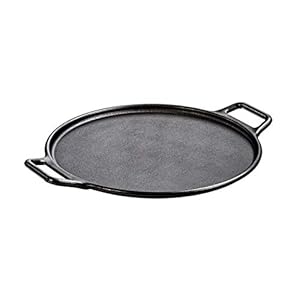
I’ve always used a Moroccan Miloui pan for my Rghaif & Milwi but I sadly lost this on one of my moving home journeys. If you too, like me, don’t have one, you can use a non-stick cast-iron pan, chapati pan or one of those handy double griddle pans for cooking your Meloui and Rghaif on. Having said that though, if you do end up using frying pans, try using two at the same time. This will cut the actual cooking time in half. On the video my sister in law used a spatular that could tuck under & lift the Meloui with no restriction before turning, but soon after I realised that my round pancake spatula worked just as well.
-
 $49.90
 -
$235.99
-
$99.99

Moroccan Meloui Recipe
Ingredients
- 1 bowl Plain White Flour (500g) all-purpose or self-raising works well too
- 1 bowl Fine Semolina (500g)
- 1 bowl Asian Brown/wheat Chapati or Rotti Flour (500g)
- 1/3 tsp Dried Yeast
- 1 tsp Baking Powder heaped tsp
- 1 tbsp Salt to taste
- 2 pints Warm Water
For spreading & Shape Forming
- 250g Unsalted Butter melted or at room temperature
- 1 tbsp Baking Powder mixed into the butter
- 1 cup Coarse Semolina for sprinkling between layers
- 1/2 bowl Sunflower Oil or Vegetable Oil
Instructions
- Mix the 3 flours and dry ingredients in a big bowl then start adding the warm water a bit at a time while mixing with your other hand
- When you have slowly incorporated all the warm water you can use both hands to knead the dough until soft but not sticky
- Return the dough back into the big bowl, smother in some oil and cover with cling film/plastic wrap.
- Leave the dough to rest like this for at least 20-30 minutes
- Divide the dough into 9-10 equal balls. Please refer to the video to see the technique. Our dough made 9 with a mini one for kids to play with. I think if you made the balls slightly smaller than ours it will make 10 even ones.
- Place on a big tray and cover again and leave for another 20-30 minutes (this will make the spreading process much easier and cause less rips/wholes in the dough.
- Spread the ball out with oil into a thin almost see-through layer and top with butter mix and sprinkled course semolina
- Fold this layer of dough from top to midway and repeat the butter & semolina process, then lift the dough bottom-up to fold down onto the butter & semolina layer. These folds will make 3 layers and form a long strip of dough.
- Butter this long strip of dough and sprinkle with some coarse semolina before rolling from one side to another to form a big coil shape log.
- Repeat this process to all the balls, cover with plastic and leave them to sit and soften for a further 20-30 mins.
- When they have been left to rest, put your pan to heat with a little oil and position the logs upright coil side down & pat them down with some coarse semolina to form a 20-24cm round and just under 1cm thick. Always start with the one you did first, as this is the one that has rested the longest so the dough will be easier to pat-down.
- It may be easier to use 2 pans to speed up the cooking process if you don't have a double griddle pan. Sprinkle some semolina on either side before placing on a heated pan to cook until golden and crispy on either side.
- It's important that while cooking the Miloui you should rotate it often for even cooking and colour.
- Miloui can be served as a sweet snack with butter and honey or it can be served as it is with savouries such as olives, cheese & salami. There are also stuffed versions with onions and meat 😉
- Meloui is also suitable for home freezing, just make sure you freeze while fresh but cooled down to room temperature. This batch was intentionally large because it was Ramadan and I wanted to freeze some for suhoor & iftaars. Feel free to half the ingredients and shape them smaller to your preference.
- Never reheat or try thawing frozen Miloui in the microwave, this will just make it dry or too tough and chewy, reheat on a frying pan or toaster, they will taste as fresh as the day you made them.